Wednesday, June 30, 2010

Review: L'Oreal Go 360 Clean Deep Exfoliating Scrub


Price: I got mine for $5.97 from Walmart.

What they say:
- Minimizes the appearance of pore size and refinishes the skin's surface
- Unique formulas reach down deeper to every last pore for a deep,
- Sweeps away dead skin cells for for softer skin
- Easy-to-use scrublet cleanses pore-by-pore

What's in it: Aqua/Water, Sodium Laureth Sulfate, Sodium Chloride, Polyethylene, Acrylates Copolymer, Cocobetaine, PPG-5-Ceteth-20, Glycerin, Sodium Hydroxide, Prunus Armeniaca Seed Powder/Apricot Seed Powder, Citric Acid, Benzyl Salicylate, Sodium Benzoate, Salicylic Acid, Parfum/Fragrance

What to do: How To Use The Scrublet: Step 1: Pop-Out. Slide Between Fingers. Step 2: Dampen Surface. Pour It On. Step 3: Cleanse. Pop Back In. Avoid Contact With Eyes. If Contact Occurs, Rinse Thoroughly With Water. If Dryness Or Irritation Occurs, Use Less Frequently.

The good stuff:
  • Inexpensive
  • Smells good!
  • A decent exfoliating scrub
  • Leaves skin feeling clean & smooth
  • Contains salicylic acid for acne
  • The scrublet is what's AWESOME!
  • You can pair the scrublet w/ other cleansers
  • You can store it in the bottle or...
  • the bottom of the handle is also a suction cup; so you can stick it to your sink, shower wall, etc.!

The low-down:

  • The scrub does not leave my skin looking any different
  • Slightly dries out my skin
  • Might be a little rough on sensitive skin

My take: First off, I think this scrub is just decent. The scrublet, however, is a whole 'nother story. But let's start with the scrub:

It's an apricot colored cleanser with little scrubby apricot seed bits and it smells like juicy apricots. If you like fruity scents, you'll probably like this... it smells super good! It lathers well (you need about a dime-sized amount) and leaves my skin feeling clean & smooth. I found the exfoliating particles to be a little harsh on my skin though, so if you have sensitive skin; you might want to be gentle while using this. It also slightly dried out my skin a bit (nothing moisturizer couldn't fix) but did not otherwise break me out or irritate my skin. However, I read a review on this same product by the lovely Angie of Pandaphilia; and it actually irritated her skin quite badly :( So if you have really sensitive skin, you might want to patch-test this product first.

Despite making my skin feel clean and smooth, I don't think it lived up to its claim to "minimizes appearance of pore size."

A close up of the scrub:


Now, on to the scrublet. I LOVE IT. It's just so cute and fun to use! Plus you can pop it back into the bottle for storage. But I've also found that the bottom of the handle is a suction cup. So it easily sticks to the shower wall or near the sink for easier access.


It's very soft, flexible plastic.


Since I don't feel like the scrub it comes with is totally amazing; I prefer to pair using the scrublet with my other cleansers that I know will give me better results (I go between using Skinfood Seaweed foaming cleanser and Kanebo Aloe foaming cleanser). I do feel like it's a lot more effective than just washing your face with your hands... it lathers the cleanser really well, is gentle, and effectively scrubs my skin. Love it!

Would I repurchase/recommend?: I personally would not repurchase this specific cleanser but I do want the try the blue on for sensitive skin though. The pink and green versions of this product contain menthol, which is too harsh for my skin. I also would repurchase this product just to get another scrublet; if mine ever gets all crappy. So I would recommend this product just to get the scrublet so you can use it with your favorite cleansers! However, I read a review by the lovely M.A.C.nunu about a $2 scrublet that you can get from Daiso. I don't think there's anywhere here where I could get one of those scrublets... but if you have a Daiso where you live; I highly suggest you check it out!


The Rundown:

Packaging:
4/5
You can store the scrublet in the bottle! However, the bottle is hard plastic, so it's harder to squeeze it to get the product to come out faster.

Product: 4/5
A decent exfoliating scrub. The scrublet is what it's all about!

Price: 5/5
Good value for the price.

Overall:

[ click here to read about my Review & Rating System ]

Monday, June 28, 2010

Love Pack from LOLANNE!!! ♥

Hello loves! Today I wanted to share this freaking amazing love pack I got from the lovely miss LOLAnne... the sneakiest, sweetest, generous, AND probably the funniest blogger I know ;)

She had a "hidden" giveaway in one of her posts awhile ago... so I entered! And recently I was talking about how I wanted to try more MAC lippies after my bad experience with their Lustreglass. So she offered to send me a Dazzleglass Creme in "Do it up." Little did I know, it was because she needed to get my address because I had actually WON that super secret giveaway she had! SNEAKY SNEAKY!

I got the package a few days ago...
and was greeted with animal butts! XD


And what else?

OMFGPENGUINAMIBABY!!!!! ♥♥♥
Soooo kawaii!
And MORE?!


OMG Anne, thank you SO MUCH ♥
She even included a MAC Mineralize Blush in "Pleasantry" (because she knows I'm on the biggest blush kick EVER right now XP)... and lots of candy!


Group shot : ) ♥


This is Pleasantry on my cheeks & Do It Up on my lips, over Maybelline Pink Please. I have to say I really like the formulation of the Dazzleglass Cremes. So smooth and don't feel sticky to me at all! Pigmentation is fabulous. Do It Up is a little bright on its own for me, but layered over a lighter lipstick, it makes a pretty, glossy, bright pink ♥ Definitely want to get my hands on more of these glosses. Pleasantry is such a soft pretty baby pink...love it too!


One last shot...
Thank you so much again, Anne!!! ♥ ya ;)
...and now I have your address. Muahahaha XD


Sunday, June 27, 2010

NOTD: Tiffany Box Blue & Bows + $1 Chanel Jade dupe?

Hello loves! Today I wanted to share what I'm currently sporting on my nails:

Tiffany box inspired!

I used ELF Mint Cream & NYC French Tip White to do the bows.

I learned how to make the bows from this tutorial:

But my white polish was kind of on the "liquidy" side, so it didn't really stay tacky long enough to drag it cleanly. Still think it turned out alright for first attempt though : )

This design is super easy and super cute. Definitely check out Narita's vid and try it out!


Also, after reading Agnes' post about possible Chanel Jade dupes, I was thinking that ELF's Mint Cream looked pretty close.

So... is it?

Here's Chanel Jade:
(image from google search)


While I don't own Chanel Jade, I can look at pictures :P So comparing it to my NOTD with ELF's Mint Cream, I'd have to say this is pretty much the closest darn dupe you are gonna get for a dollar. Chanel Jade is greener and more true "jade," while ELF Mint Cream is bluer and of course, closer to a Tiffany Blue shade and doesn't have shimmers. However, they both seem to be around the same level of "pastelness."

So while you probably won't feel as luxurious having ELF Mint Cream on your nails, it's still a fun shade to wear that is decently similar to Chanel Jade, especially since it's only $1!

Thursday, June 24, 2010

Latest MACquisitions: Ravishing Cremesheen Lipstick (Pics + Swatches)

Hello loves! So I'm sure you know by now that every time I have some Macy's gift cards to use, I use 'em at MAC. I decided to not pick up a blush this time (gasp!) because I had wanted to get the Richer, Lusher Cremesheen Glass. However, our Macy's counter was out of stock and their next shipment was not gonna be in for a couple of weeks... and they don't know what exactly they would be getting in the shipment -_-;

So I ultimately decided on getting a Cremesheen Lipstick in Ravishing, since I had been interested ever since Angelique recommended it : )

Is it just me, or is this packaging kinda unattractive? :/

Ravishing is described as a "clean light peachy coral" and I'd have to agree. Since I've been wanting to try more peach/coral lippies, this is perfect! I love this shade. It's bright but not overwhelmingly bold. Very pretty and fun.

Flash:

Natural light:

I sent the Love Nectar Lustreglass back and am currently waiting for my refund. Then I'm planning on buying Richer, Lusher online, 'cause I'm too impatient to wait several weeks for our MAC counter's shipment just to possibly be disappointed. But right now, I'm totally happy with this lipstick. I love how smooth, creamy, and moisturizing it feels and how pigmented it is. Definitely gonna add more MAC lipsticks to my "to-buy" list ;)

How "Ravishing" looks on:
(with a little Revlon Super Lustrous "Life's a Peach" gloss over it)


Swatches in different lighting:


Happy Friday, everyone!
(well, it's almost Friday here :P)

Wednesday, June 23, 2010

Project Herro! Showin' some Love for Herrohachi ♥

I'm sure many of you know Kym, the amazing creative force behind the awesomeness that is Herrohachi! She sells the cutest and funniest handmade t-shirts, buttons, and bags. I was totally honored to be able to contribute a design to her collection (Herro, Cupcake!) and I am a proud owner of three shirts so far :D

Well, her official Herrohachi website will be launching very soon... so she's asking for people from all over the world to participate in Project Herro! All you need to do is take a picture of yourself with a speech bubble saying "hello" in your language, from the country you are in; with something that represents where you are from.

So... I live in Hawaii and yes, we are part of the US of A ;) And what could be more Hawaii-appropriate (and cheesier) than a LEI?! XD


So here is my contribution to Project Herro!I notice that when I am not the photographer, I tend to squint -_-;
Extra photo :P It has been raining here all week! BOO :( So it's a bit overcast.
And here's a quick rundown on what I'm wearing...
  • EDM Pressed Powder - Light
  • Wet N Wild Color Icon palette - Vanity
  • MAC Powder Blush - Hipness
  • Wet N Wild Mega Last Lipstick - Pink Suga
  • Revlon Super Lustrous Lipgloss -Life's a Peach
Anywho,
if you want to be a part of Project Herro,

click here to read more about it, and get in touch with Kym!

Tuesday, June 22, 2010

Recipe: Super Simple Quiche!

Hello loves! I don't know if I've mentioned this before... but... I cannot cook to save my life. You know how some people can cook from the "heart," so to speak? Like where they can just add things without measuring and create a delicious meal? Well, I can't do that. If I don't have detailed step-by-step instructions with specific amounts for every single ingredient; I'm totally lost. The art of frying steak or making stew is beyond me. Unlike my mom; who can just throw stuff in a pot and create delicious soup without even trying. I am a hopeless cook.

However, I think I am at least ALRIGHT at baking. And I damn sure know that I am a fucking PRO at microwave-directions food... and making rice. I make perfect rice every time. LOL :P

So today I figured I would share this super simple recipe for quiche that I made last week. We had some frozen pie crusts, so I made one chocolate pudding pie and had to do something with the other crust. So I browsed the interwebs and found this super simple recipe (sorry, can't remember exactly where I got it).

The end result?
YUM.


Haha, so proud of myself...
I am not TOTALLY useless in the kitchen :P

On to the recipe!

Super Simple Quiche

Ingredients:
  • 1 pre-made pie crust (9 inch)
  • 3 Eggs
  • 1 Cup milk
  • Salt and pepper
  • 1 Cup shredded cheese (I used Cheddar)
  • Fillings: Anything you would put in an omlette; you can put in a quiche.
    You can put as much fillings as you want. I used:
    - Spinach (frozen; make sure to defrost and drain out the water really well)
    - Onions, chopped
    - Mushrooms, sliced
    - Bacon, crumbled

Directions:

  1. Set the oven to 375 degrees F.
  2. You can prebake the crust if you wish (follow the package directions), but it's optional. I didn't prebake. Just keep the frozen crust out so you can toss all your ingredients in it.
  3. Mix together the eggs and milk. Add salt and pepper... as much as you want.
  4. Prepare the fillings.
  5. Layer your fillings into the crust. I put the sliced mushrooms on the bottom, then the bacon, onions, cheese (1/2 cup), then spinach.
  6. Pour egg and milk mixture on top.
  7. Top with the remaining 1/2 cup of cheese.
  8. Place quiche on baking sheet and bake for 30-40 minutes or until the edges are firm and the center has just a hint of movement when shaken. The quiche will continue to cook until served. For a firmer quiche, cook until the entire dish is puffed and solid.

Tips:

  • When baking the crust (if you prebake), cover with foil and fill with dried (uncooked) beans to prevent the crust from puffing up during baking.
  • If the edges of the crust brown before the quiche is done, place foil over the crust to prevent further browning.
  • Make sure any fillings you put in the quiche are drained completely, especially cooked spinach. Squeeze out any liquid or squeeze between paper towels, otherwise the moisture will make the quiche soggy and watery.

Aaand that's it!
Simple deliciousness : ) Enjoy!


Monday, June 21, 2010

Introducing { e.motion in: motion; } Version 3.0! Updates, Changes, & Additions explained!

Hello loves! Just wanted to thank everyone who shared their thoughts in my last post. Your input is very much appreciated and very helpful : )

But, being the super-indecisive person that I am; I STILL couldn't make a decision between the two. Sooo... I decided to make a compromise and combine the two layouts into one. I am happier with this combination and I hope you'll enjoy it too. I simplified the banner so it would be less busy and more balanced; kept the quilted background; and removed the eyeliner separators (they were cute but started to seem a bit "much" XP).

You may or may not have noticed, but a few things were also moved around, removed, and/or added. This post is meant as a little explanation about the new or recent features and changes the blog has undergone. Hope it helps! : )

I removed the Blogger navbar.
So if you were used to using the "search" functionality there, it has moved to my sidebar!

The drop-down navbar is back in business.
With information about the blog, myself, sorted posts, & more.
Will be adding a link to my blog sale here.


Semi-new Announcements & Updates section.I always have had this section but never really made use of it. From now on, it'll be a list of my upcoming post schedule and other updates, such as additions to my blog sale, giveaway/contest announcements, etc.
Semi-new "Connect" feature.I decided to add this in my sidebar since it seems to be a common feature on most blogs. An easier way to get connected with me! You can view/subscribe to my rss feed, catch me on my Facebook fanpage, my Youtube channel (which is currently being used solely for my video editing projects), check out my artwork & photography at my Deviantart, and email me.

Btw, thank you to everyone who has "liked" { e.motion in: motion; }'s Facebook fanpage so far! It really means a lot. Since I figure just about everyone has a FB now, it's another great way for me to keep in touch with my readers and announce new blog posts. Plus, I post a lot of promo codes there *wink* ;)

Join me on Facebook for post previews, pictures, sales, updates, and more!
http://www.facebook.com/pages/-emotion-in-motion-/118026268238581


Semi-new Review sorting.
So this feature has been around for several weeks actually, but I just thought I should point it out anyway ;) Created this section for a quick and easy way to search through my pile of reviews; sorted by brand, product, or type.


New Jump breaks,Also a few new additions. I don't really like jump breaks much myself, but I know that some of my posts get retardedly long and even I don't like looking at them much. So I'll be using jump breaks occasionally.... :P

New Post separators,(the pink line between my blog posts)
I actually didn't know you could add post separators until I came across this wonderful code from AllBlogTools. If anyone is interested in having fancy dividers between your posts, check out the link!

and New Numbered page navigation.
I also found this code from AllBlogTools (that site is so freaking awesome, really). Decided to add this feature to make it easier when going through my older posts!

Removed my Formspring box, & linked it instead.
And lastly, I have removed my Formspring Q&A box since I haven't been getting much questions lately so it was just taking up space. So incase anyone has any questions they'd like to ask, my Formspring is still linked under the "Contact me" section.

So that's pretty much all that's new with { e.motion in: motion; } Version 3.0. I hope you like the new layout and that the new additions will make this blog more user-friendly : )

Wednesday, June 16, 2010

Review: Revlon Fantasy Lengths False Eyelashes in "Intensifying"

Hello loves! Been feeling a bit under the weather lately... but blogging doesn't consume much of my energy so I'm content to just sit here and type for awhile :P Today I wanted to review the Revlon Fantasy Lengths Self-Adhesive false lashes that I got from Sammie's giveaway.


These are #99500 - Intensifying.
Price: Online I found them for $3.50 - $6.59

What they say:Click to view larger
What to do:
Click to view larger


The good stuff:

  • Not too expensive

  • Self-adhesive... no messy glue!

  • Easy to use

  • Long, yet "natural" looking

  • Thick black band mimics the look of eyeliner

  • Useful packaging

  • Adhesive stays sticky

  • Comes with an extra adhesive strip & plastic tool for pressing lashes

  • You can always re-use w/ your own lash glue
The low-down:
  • Inner corner of lashes pokes my eyelid even after trimmed (I seem to have this problem with some false lashes)
  • Not as "dramatic" looking as the name implies
My take: I've been wanting to try these lashes for a really long time so I was thrilled to have won them in Sammie's giveaway! First off, I'd have to say that the self-adhesiveness is truly awesome. I hate lash glue because it's messy and tedious and I tend to get it all over my eye... not to mention it's hard to remove. So having the self-adhesive strip is a godsend! It's very sticky so no worries about the lashes falling off. And it stays sticky so if you need to reposition the lashes, it's no problem! It also comes with an additional self-adhesive strip but stupid me threw away the plastic tool for properly pressing the lashes into the new strip -_-; Not sure how many re-uses you can get out of one strip, but it's so sticky so I'd say at least two? And then you can always use your own lash glue after.

Another plus is the packaging. It is great for safely storing your lashes when not in use! The little plastic covers are especially useful for keeping the lashes in place.


At first glance, "Intensifying" seems just that -- really intensifying! But it's actually not. I was hoping they would be a little more "dramatic" but they end up looking really "natural" on me. These lashes are really long (yet luckily, they do not press against my glasses lens so I can still wear them w/ glasses on) but they are sort of "wispy" and sparse. I think they would be more "intensifying" on people who already have full, long lashes and just want more oomph. On me, they just look "natural."
Top view. These lashes are really long. Looks like it adds a lot of volume but it doesn't, really.


When I open my eyes, they are very wispy.
Sorry for the bad lighting/quality of this one, but you get the idea.

I found the thick black band to be a little rigid... but nothing too bad. I like how it mimics the look of eyeliner, on me at least. One thing I had trouble with though was that before and after trimming, the inner end of these lashes poke the inner corner of my eyelid, which is very irritating. I've had this problem with some other false lashes, so maybe it's the way I'm cutting them??? Idk. But the irritating feeling of my eyelid getting poked comes and goes. Thus, I often find myself slightly re-positioning false lashes all the time, so this was no surprise.

Lashes on, with no eyeliner
Looks like I'm wearing eyeliner, no?

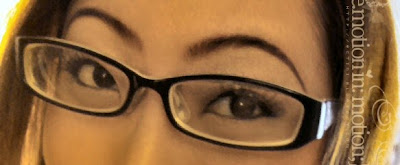
 Lashes on, with eyeliner
Only needed to add the "wing" at the end!


 Lashes with eyeliner & eyeshadow


More after the jump!